| 10 People Are Viewing This Product Right Now |
Off-Grid DIY Solar Kits: Everything You Need to Know Before Cutting the Cord with the Utility Company
Something shifted in the American energy landscape around 2020, and it hasn’t shifted back. Maybe it was the rolling blackouts in Texas during that brutal winter storm, or California’s fire-season shutoffs that left millions in the dark, or simply the cumulative frustration of watching electricity bills climb year after year with no end in sight. Whatever the catalyst, a growing wave of homeowners, cabin dwellers, van lifers, and rural property owners started asking the same question: What would it actually take to generate my own power?
Off-Grid DIY Solar Kits – That question inevitably leads to solar. And more specifically, it leads to off-grid DIY solar kits — pre-packaged systems designed for people who want to produce, store, and manage their own electricity without remaining tethered to the traditional power grid. These kits have matured dramatically over the past five years.
They’re no longer fringe products cobbled together for survivalists. They’re engineered systems with real components, real warranties, and real capability. But — and this is the part that doesn’t get said enough — they’re also products that demand a genuine understanding before you pull out your credit card.
I’ve spent years watching people succeed brilliantly with these kits and also watched others waste thousands of dollars because they didn’t understand a handful of critical concepts upfront. This article exists to bridge that gap.
What “Off-Grid” Actually Means (And Why the Distinction Matters More Than You Think)
Let me be blunt about something: the term “off grid” gets thrown around so loosely online that it’s practically lost its meaning. People slap solar panels on their roof, keep their utility connection, and call themselves off grid. That’s not off grid. That’s grid-tied solar with net metering, which is a perfectly fine setup — but it’s fundamentally different from what we’re discussing here.
A true off-grid system has zero connection to utility power. None. You generate it, you store it, you use it. If your batteries die at 2 AM and you haven’t planned properly, you sit in the dark. There’s no safety net. This is exactly why off-grid DIY solar kits include battery storage as a core component, not an optional add-on. Without batteries, an off-grid system is just panels that work when the sun shines and paperweights when it doesn’t.
The reason this distinction matters practically is that it changes everything about how you size your system. Grid-tied users can afford to undersize their panels because the grid backs them up. Off-grid users cannot. Every watt-hour you’ll consume needs to be accounted for — plus a margin for cloudy days, seasonal variation, and the inevitable inefficiencies that occur in every energy system.
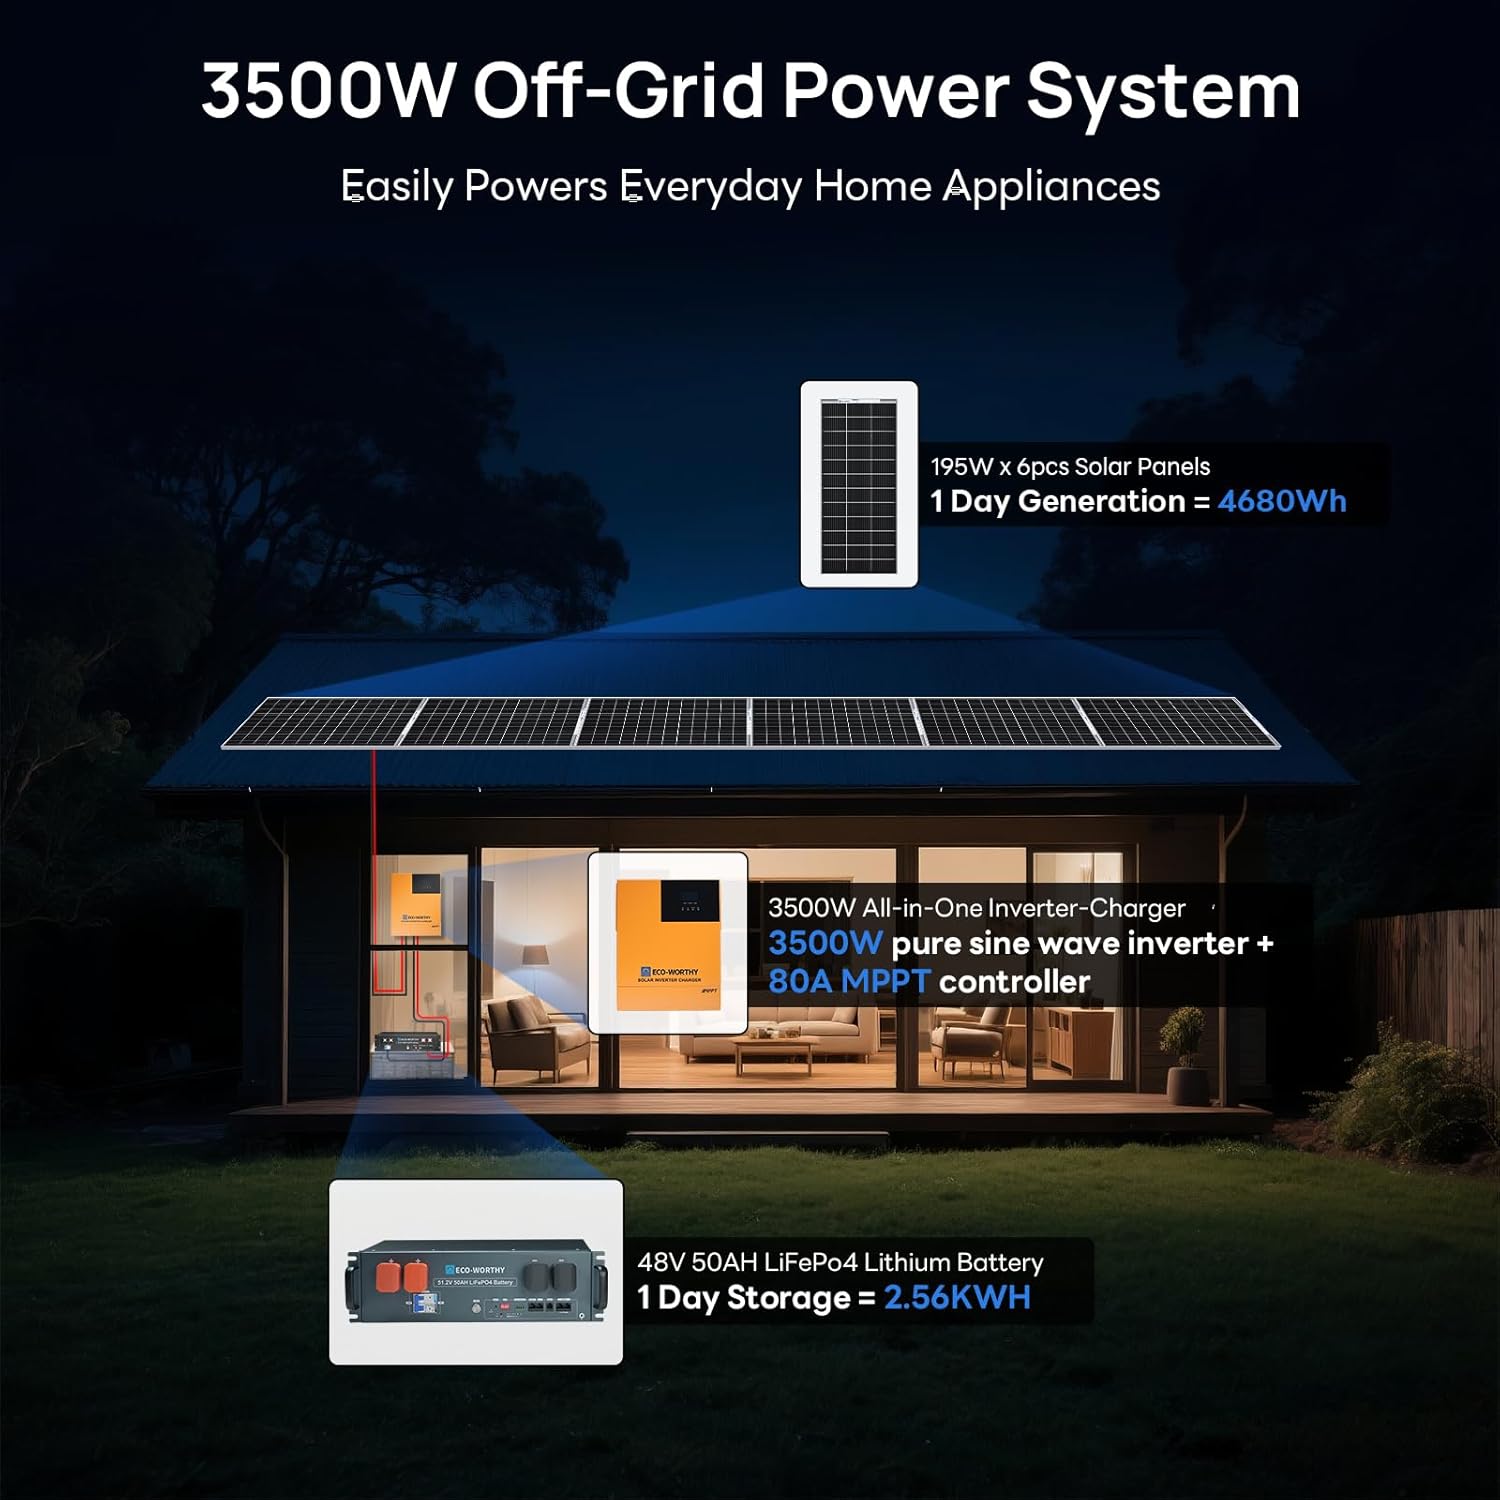


Off-Grid DIY Solar Kits Anatomy: What’s Actually in the Box
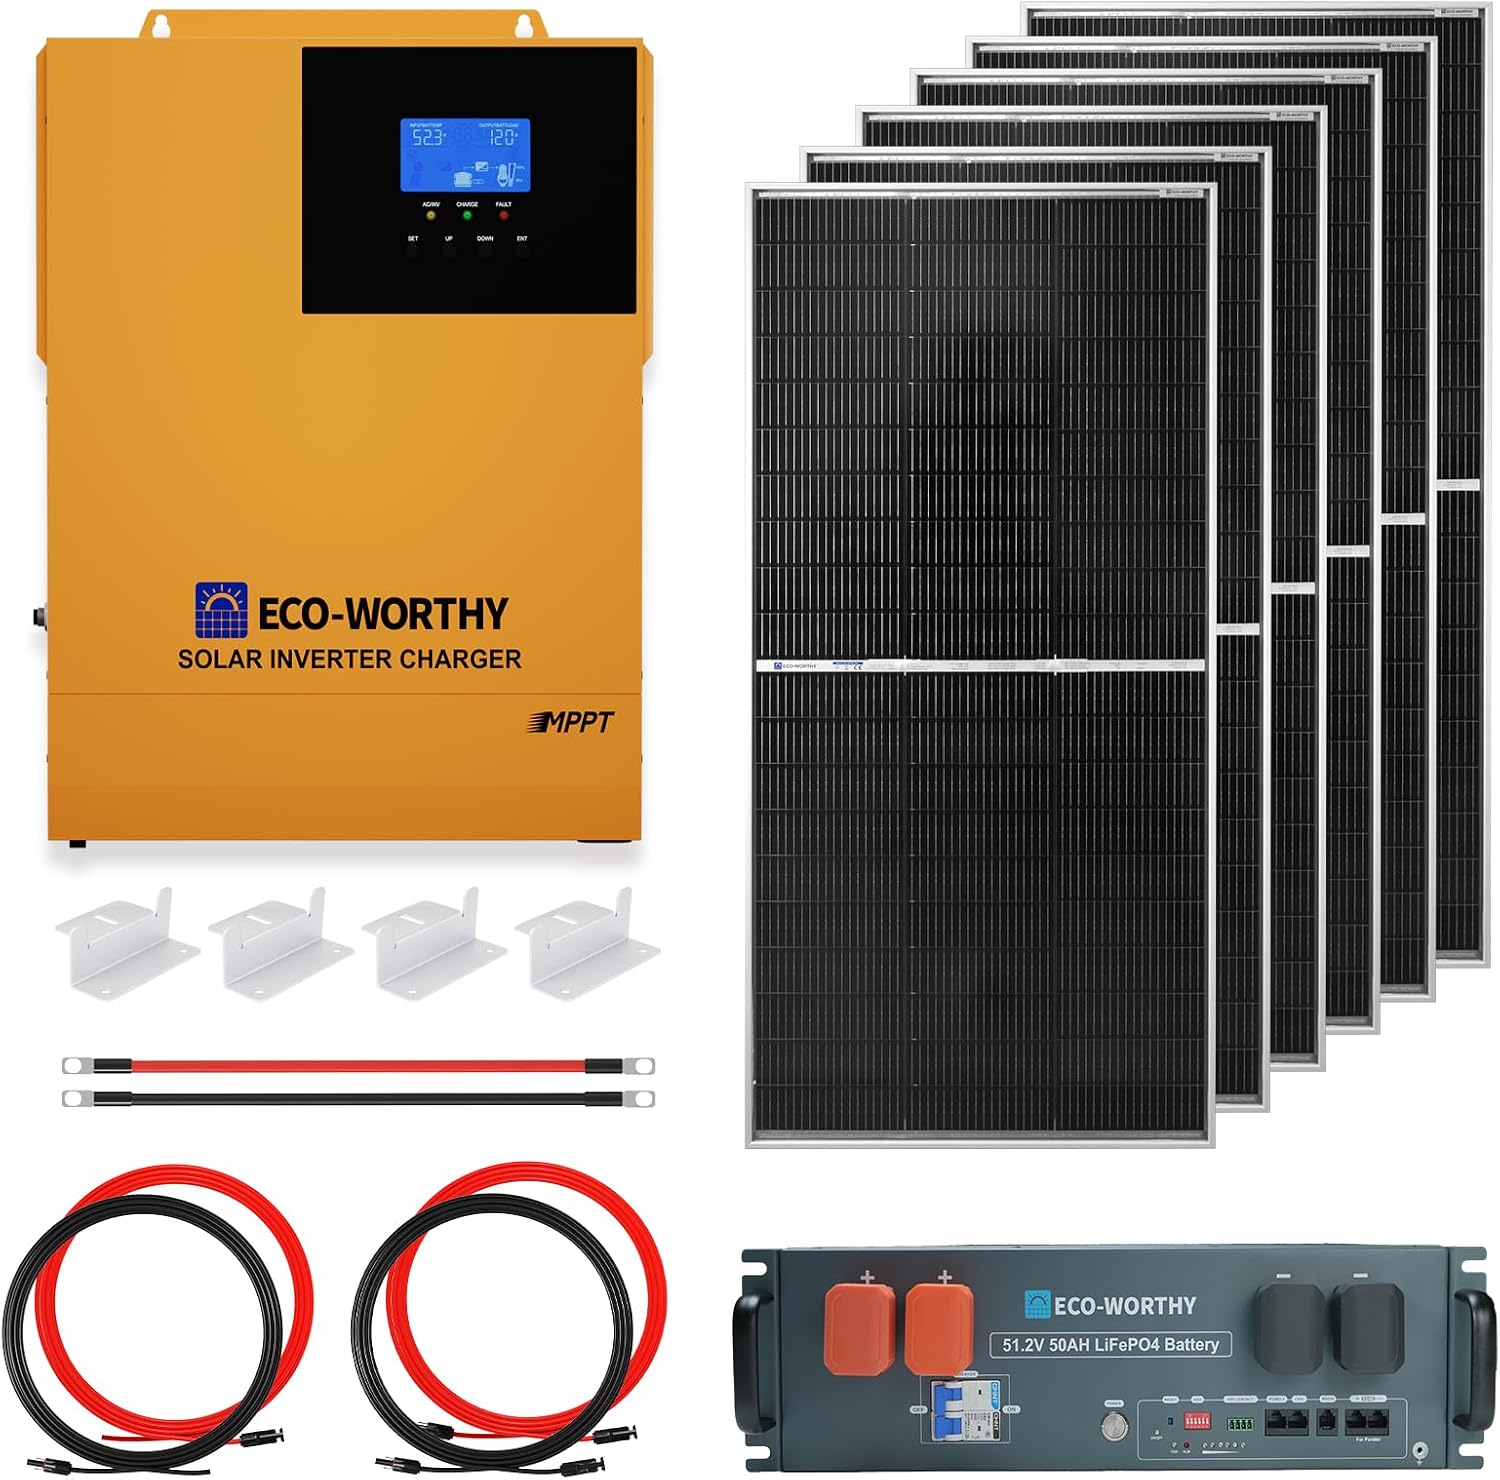
Most off-grid DIY solar kits ship with four primary components, though the specifics vary by manufacturer and price point.
- Solar panels are the obvious starting point. Most kits now ship with monocrystalline panels, which have largely won the efficiency battle against polycrystalline. You’ll see wattages ranging from 100W per panel (common in small portable kits) up to 400W+ per panel in residential-scale systems. The panels themselves are probably the most reliable component in any solar setup — modern panels degrade at roughly 0.5% per year, which means they’ll still be producing around 87% of rated output after 25 years.
- A charge controller sits between your panels and your batteries, regulating the voltage and current flowing into storage. This is one of those components that beginners overlook, and veterans obsess over. There are two types: PWM (Pulse Width Modulation) and MPPT (Maximum Power Point Tracking). PWM controllers are cheaper and work fine for small, simple systems. MPPT controllers cost more but extract significantly more energy from your panels — sometimes 20-30% more in non-ideal conditions. For any system above about 400 watts, MPPT is worth every penny.
- Batteries are where most of the cost lives and where most of the decisions get complicated. I’ll dig deeper into this below, but the short version: lithium iron phosphate (LiFePO4) batteries have become the dominant choice in DIY off-grid systems, displacing the lead-acid batteries that ruled for decades. They cost more upfront but last roughly three to four times longer and can be discharged much more deeply without damage.
- An inverter converts the DC electricity stored in your batteries into the AC electricity that most household appliances need. Inverters come in pure sine wave and modified sine wave varieties. Modified sine wave inverters are cheaper, but they produce a choppier electrical waveform that can cause problems with sensitive electronics, motors, and anything with a digital clock or microprocessor. For a home system, pure sine wave is really the only serious option.
Some kits also include mounting hardware, wiring, fuses, breakers, and monitoring equipment. Others leave these as separate purchases, which can add $200-$800 to your total cost depending on system size and complexity.
Sizing Your System: The Math That Nobody Wants to Do (But Everyone Needs To)
Off-Grid DIY Solar Kits – Here’s where most DIY solar projects either succeed or collapse. Sizing a system correctly requires you to know — with reasonable precision — how much electricity you actually use. Not how much you think you use. Not how much your neighbor uses. How much you use.
Start with an energy audit. Go through your home or cabin and list every electrical device, its wattage, and how many hours per day you run it. A refrigerator might draw 150 watts but cycles on and off, so its actual daily consumption might be around 1.5 kWh. A laptop charger draws 60 watts for maybe 4 hours a day — that’s 240 watt-hours. A well pump might pull 1,000 watts but only runs for 30 minutes total throughout the day — 500 watt-hours.
Add it all up. That daily total in watt-hours is your baseline. Now multiply it by at least 1.25 to account for system inefficiencies (inverter losses, charge controller losses, wire losses, and battery round-trip efficiency). This adjusted number is what your solar array needs to produce on an average day.
But “average day” is a loaded phrase. Solar production varies wildly by season and geography. A system in Tucson, Arizona will produce roughly twice as much annual energy as the same system in Seattle, Washington. NREL’s PVWatts Calculator (pvwatts.nlr.gov) is a free tool that lets you input your location and system specs to get realistic production estimates month by month. I cannot overstate how useful this tool is. Bookmark it.
For off-grid systems, you should size for your worst month, not your best. If January only gives you 3 peak sun hours in your location while July gives you 7, your panel array needs to be large enough to meet your daily needs during those lean January days — unless you have a backup generator for winter, which honestly, most serious off-grid setups do.

The Battery Question: Lead-Acid vs. Lithium and Why the Answer Isn’t Always Obvious
The battery debate has been mostly settled in the court of public opinion — lithium wins. And in most cases, that’s the right call. LiFePO4 batteries offer 3,000-5,000+ charge cycles at 80% depth of discharge, compared to roughly 500-800 cycles for flooded lead-acid at 50% depth of discharge. They’re lighter, require no maintenance, don’t off-gas hydrogen, and have a flat discharge curve that delivers consistent voltage until they’re nearly empty.
But here’s where I’ll offer a slightly contrarian take: lead-acid batteries still make sense in certain scenarios. If you’re building a seasonal cabin that sits unused for months, lead-acid’s lower upfront cost (roughly one-third the price per kWh of lithium) can be appealing.
If you’re on a tight budget and building a starter system with plans to upgrade later, a bank of 6-volt golf cart batteries from Costco or Sam’s Club can get you running for under $500. They’ll need to be checked, watered, and equalized periodically, and they won’t last as long — but they work.
The real cost comparison requires thinking in terms of cost per cycle, not cost per battery. When you do that math, lithium almost always wins over the lifetime of the system. A $1,200 LiFePO4 battery lasting 4,000 cycles costs about $0.30 per cycle. A $300 lead-acid battery lasting 600 cycles costs $0.50 per cycle. Over ten years, the lithium battery is substantially cheaper, even though it cost four times more at the register.
One more thing about batteries that kit sellers don’t always make clear: your battery bank capacity should cover at least two to three days of autonomy. Meaning, if you use 5 kWh per day, you want 10-15 kWh of usable battery capacity. “Usable” is the key word — with lead-acid, you should only discharge to 50%, so a 10 kWh lead-acid bank only gives you 5 kWh of usable capacity. With lithium, you can safely use 80-90%, so a 10 kWh lithium bank gives you 8-9 kWh of usable capacity.
Off-Grid DIY Solar Kits I’d Actually Recommend Looking At (and What to Watch Out For)
I’m not going to pretend to offer an unbiased comparison chart — those exist all over the internet, and most of them are thinly disguised affiliate marketing. Instead, I’ll share what I’ve observed from real installations.
- Renogy has been in the DIY solar space longer than most and offers kits at nearly every price point. Their components are solid mid-range quality. Not the cheapest, not the best, but genuinely reliable. Their 400W and 800W cabin kits are excellent entry points for someone powering a small off-grid structure. Their documentation and customer support have improved substantially since their early days.
- Rich Solar and BougeRV have emerged as competitive alternatives in the budget-to-midrange segment. Both offer MPPT-equipped kits with decent panels. Quality control has been generally good, though I’ve heard scattered reports of inconsistent panel output ratings.
- EG4 has carved out an interesting niche with their all-in-one inverter/charger units combined with their own LiFePO4 batteries. Their 6000XP inverter, paired with their server rack batteries, has become genuinely popular in the DIY off-grid community for larger home systems. It’s not technically a “kit” in the traditional sense, but they’ve made the component matching easy enough that it functions like one.
- Eco-Worthy sits at the premium end. Their components are used extensively in marine, RV, and professional off-grid installations. An Eco-Worthy-based system costs more, but the monitoring software (VRM portal), the build quality, and the technical support ecosystem are in a different league. If you’re building a system you want to rely on for decades, Eco-Worthy components are hard to beat.
What to watch out for: Be skeptical of any kit that seems dramatically cheaper than comparable offerings. Sometimes the savings come from undersized wire gauges (creating fire risks), cheap PWM controllers instead of MPPT, or no-name batteries with inflated capacity claims. Also, some “off-grid kits” advertised online are really just panel-and-controller packages with no batteries or inverter included — read the component list carefully before purchasing.

Installation: What DIY Really Means Here
Let’s talk about what you’re actually signing up for when you choose the DIY route.
Mounting panels on a roof or ground mount requires basic construction skills. You’ll need to drill into rafters or pour small concrete footings, depending on your approach. Ground mounts are generally easier for DIY installers and have the added advantage of adjustable tilt angles. Roof mounts save yard space but require penetrations that must be properly flashed and sealed — a roofing leak from a bad panel mount is a frustrating irony.
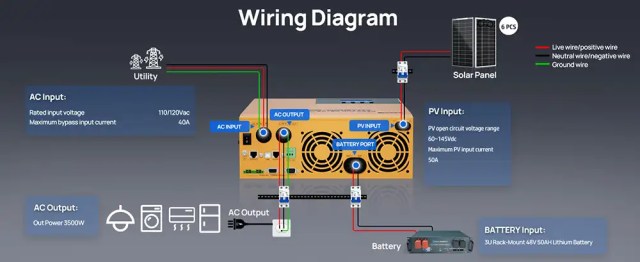
The electrical wiring is where most people feel less confident, and rightfully so. You’re working with DC voltages that can reach 100-150 volts on the panel side (or much higher in series-wired arrays) and AC voltages of 120/240V on the inverter output side. This isn’t something to approach casually.
If you’re comfortable with residential electrical work and understand wire sizing, fusing, grounding, and circuit protection, you can absolutely handle this. If you’ve never wired anything more complex than a light switch, I’d strongly suggest hiring an electrician for at least the AC side of the installation.
One thing I’ve noticed in the DIY solar community is a tendency to undersize wiring. Voltage drop over long wire runs is real and can significantly reduce system performance. Use a voltage drop calculator (there are several free ones online), and when in doubt, go up one wire gauge. Copper is cheaper than lost energy.
Grounding is non-negotiable. Both the equipment grounding (bonding all metal frames and enclosures) and the system grounding (connecting to earth ground via a ground rod) need to be done properly. This isn’t just about code compliance — it’s about not getting electrocuted and not having your system destroyed by a lightning strike.
Permits, Codes, and the Boring Stuff That Protects You
Whether you need a permit for an off-grid solar installation depends entirely on where you live. In many rural counties, particularly in states like Arizona, New Mexico, Nevada, and parts of the Mountain West, permitting requirements for off-grid properties are minimal or nonexistent. In more regulated jurisdictions, you may need electrical permits, structural permits for roof mounts, and inspections.
The National Electrical Code (NEC), specifically Article 690 (Solar Photovoltaic Systems) and Article 706 (Energy Storage Systems), provides the technical standards for solar installations. Even if your county doesn’t enforce permits, following NEC guidelines is in your own self-interest. These rules exist because people have been hurt or killed by improperly installed electrical systems.
If you’re building an off-grid home and ever want to get it insured — or sell it — having a system that’s been installed to code and potentially inspected will matter. Insurance companies are increasingly savvy about solar installations, and a DIY system that looks sketchy could affect your coverage.
The Generator Question
I’m going to say something that solar purists might not love: most serious off-grid systems benefit from having a backup generator. Solar is remarkable technology, but it has one obvious limitation — it requires sunlight. A week of heavy overcast skies in winter can drain even a well-designed battery bank.
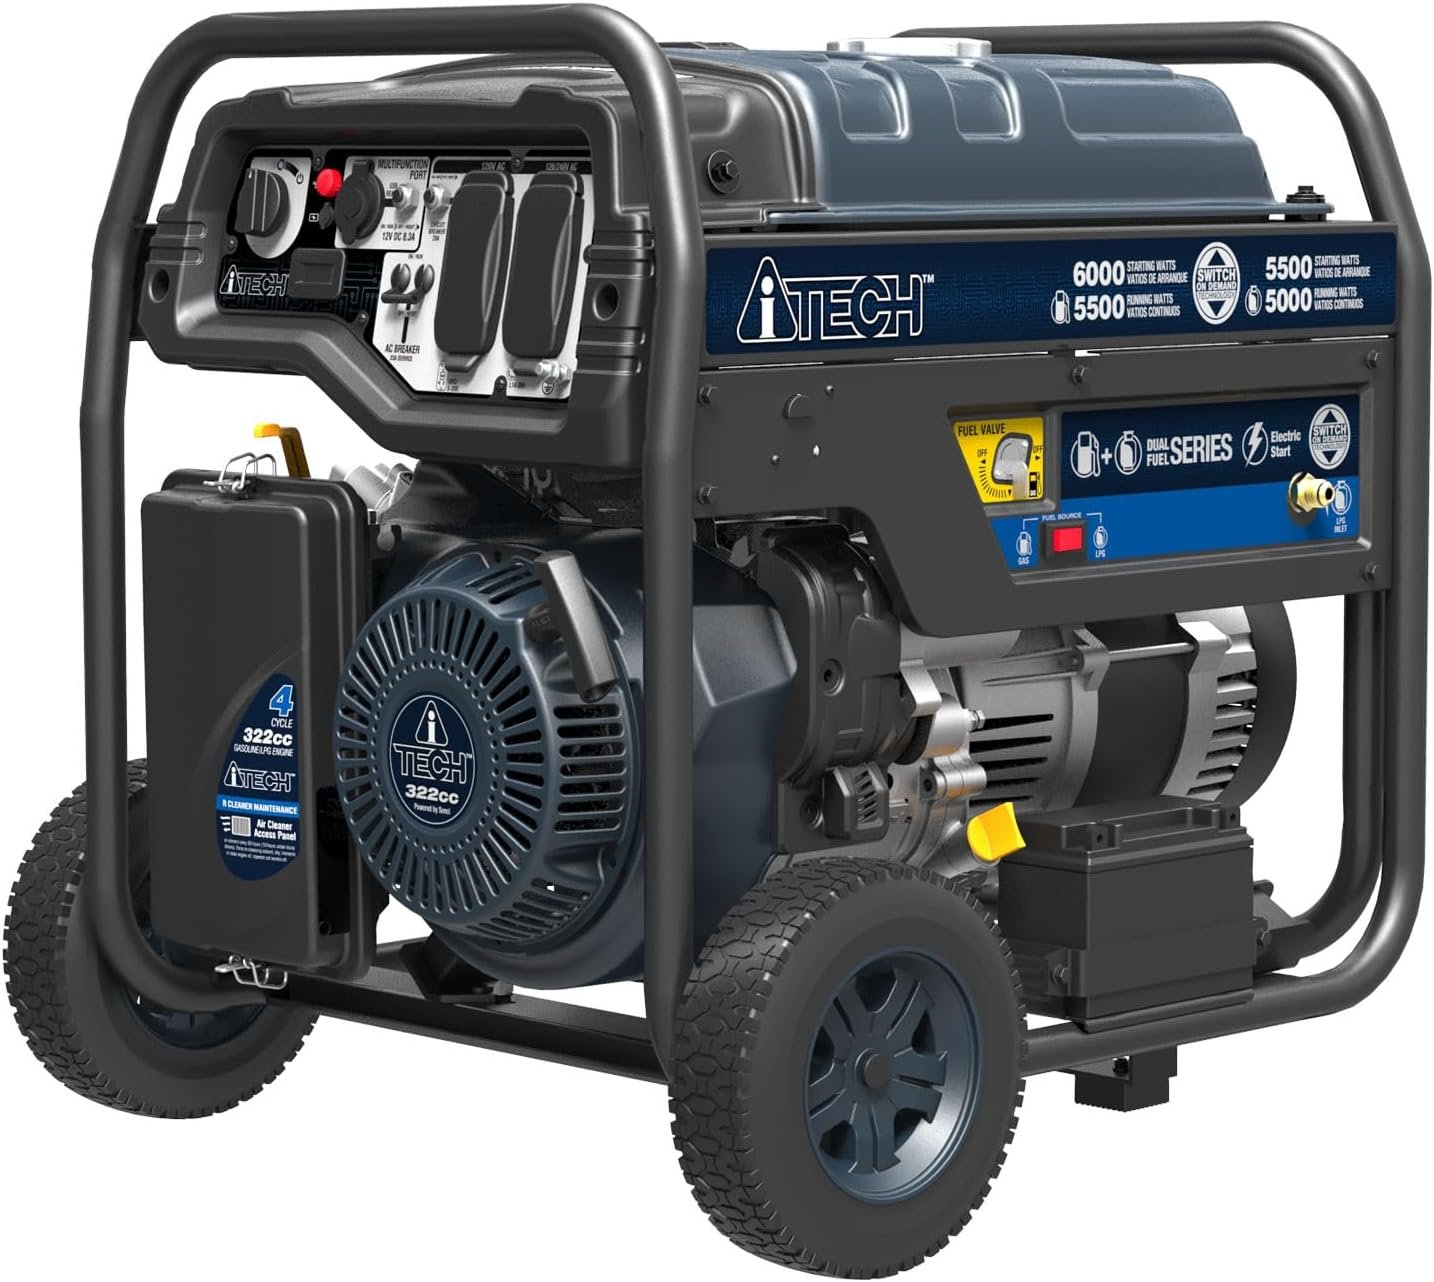
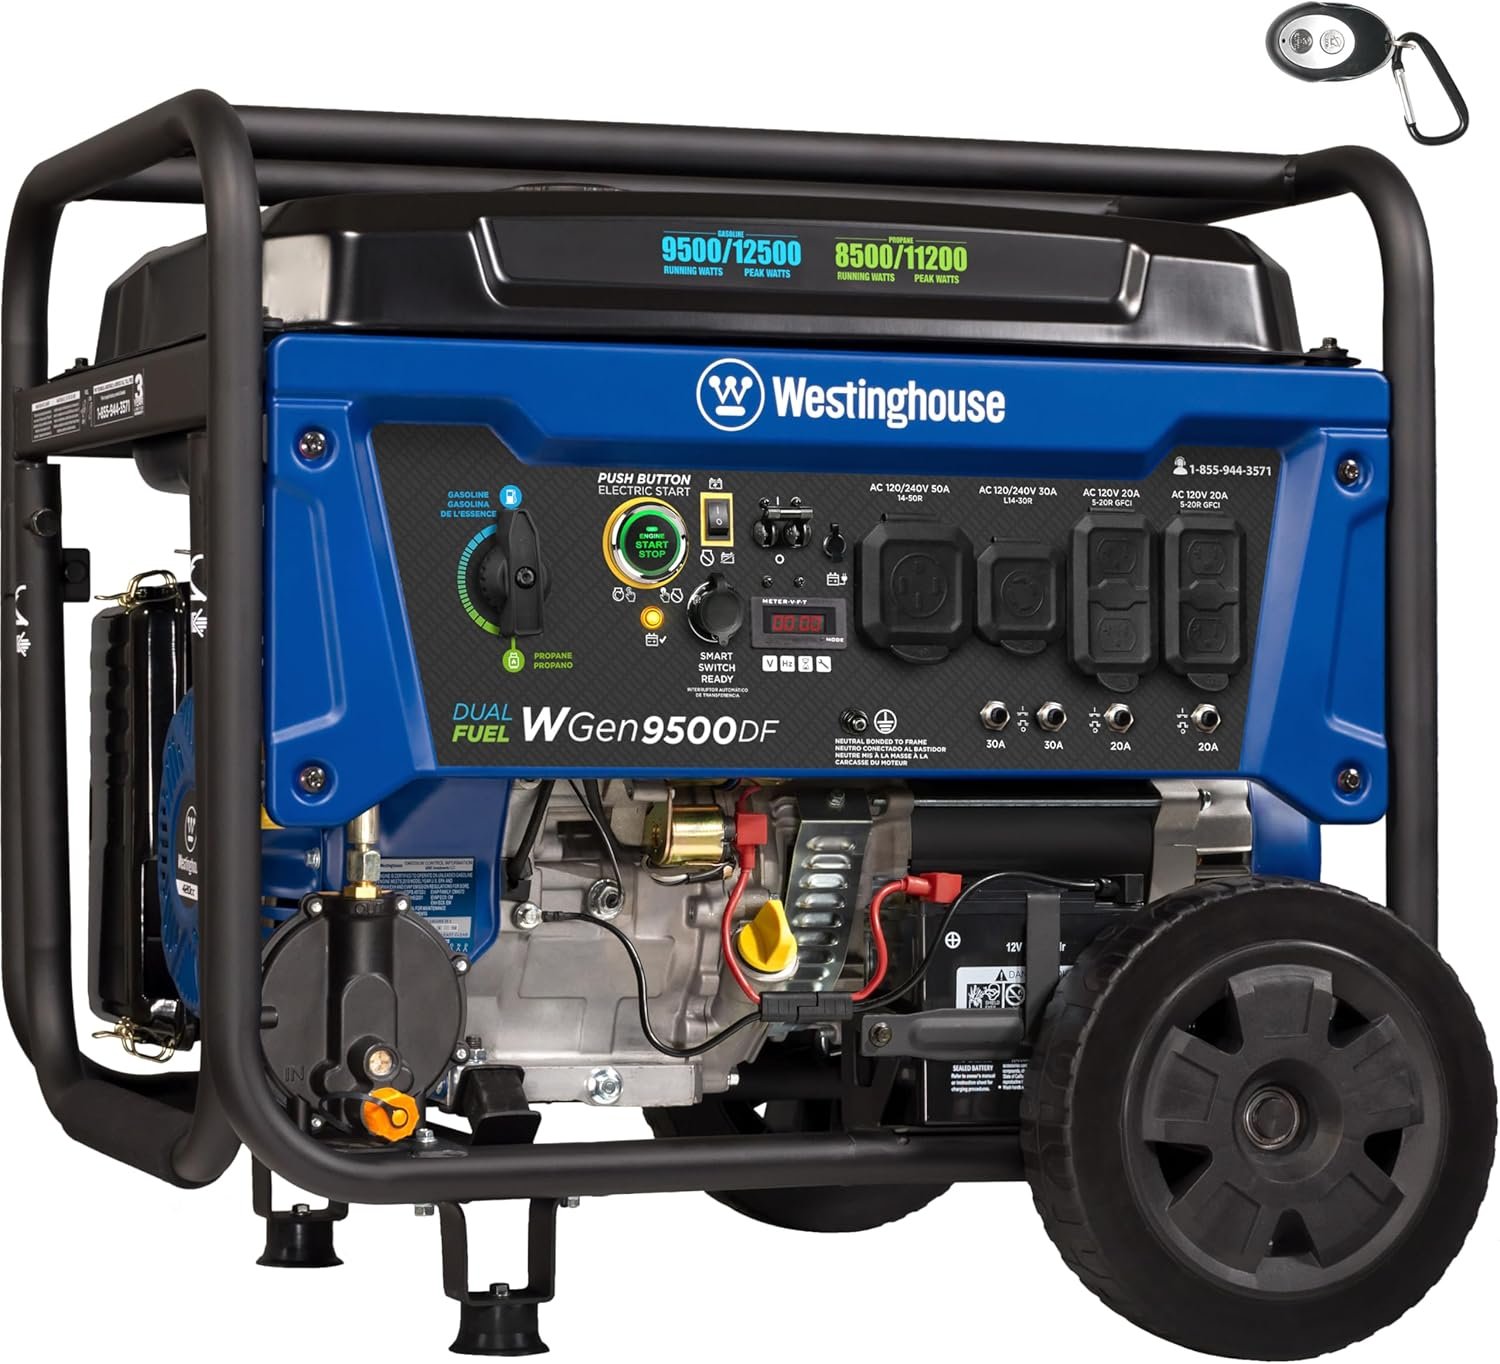
A modest propane or dual-fuel generator (3,000-5,000 watts) can serve as your insurance policy. You don’t run it daily. You run it during those stretches when nature isn’t cooperating. A generator paired with your system’s battery charger can top off your batteries in a few hours, keeping you running until the sun returns.
Some inverter/charger units (like the EG4 12000XP or Eco-Worthy) have integrated AC input connections specifically designed for generator integration. They’ll automatically start charging your batteries when a generator signal is detected and stop when the batteries are full. It’s elegant redundancy.
The cost of a decent generator ($500-$1,500) plus the fuel you’ll use over a year (probably $100-$300 for occasional use) is far cheaper than oversizing your solar array and battery bank to cover every conceivable worst-case scenario.
Common Mistakes That Cost Real Money
After watching dozens of DIY installations — successful and otherwise — a few patterns emerge.
- Mistake #1: Buying based on panel wattage alone. A “3,000 watt solar kit” sounds impressive until you realize that 3,000 watts of panels in Michigan in December might only produce 6-8 kWh per day. Panel wattage is the theoretical maximum under ideal test conditions. Real-world production depends on location, orientation, tilt, shading, temperature, and system losses.
- Mistake #2: Ignoring phantom loads. That Wi-Fi router drawing 12 watts doesn’t sound like much until you realize it’s consuming 288 watt-hours per day, every day. A cable box on standby, a microwave with a clock display, a phone charger left plugged in — these “vampire” loads add up shockingly fast in an off-grid context. In a grid-tied home, they’re rounding errors. Off grid, they’re meaningful consumers of your stored energy.
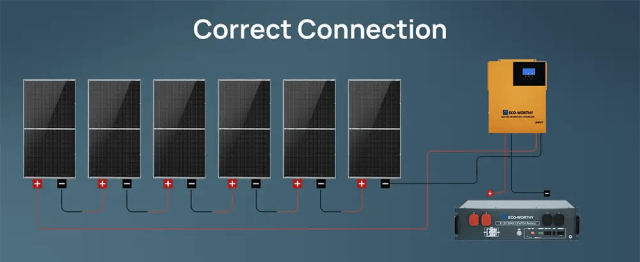
- Mistake #3: Placing panels where shade hits them. Even partial shading on one panel in a series string can reduce the output of the entire string dramatically. This is because of how series-connected panels work — the weakest link constrains the whole chain. Site your panels where they’ll have unobstructed solar access from at least 9 AM to 3 PM year-round. If you can’t avoid some shade, consider microinverters or power optimizers that allow each panel to operate independently.
- Mistake #4: Not budgeting for the complete system. Panels and batteries get all the attention, but the “balance of system” costs — wiring, conduit, breakers, fuses, disconnects, mounting hardware, battery enclosures, monitoring equipment — can easily add 20-30% to your total project cost. Factor this in from the start.
- Mistake #5: Treating this as a permanent, unchangeable decision. One of the best things about DIY solar is its modularity. You can start with a smaller system and expand. Many charge controllers and inverters are designed to be paralleled or to accommodate growing panel arrays and battery banks. Starting with a 2 kW system and growing to 5 kW over two years is a perfectly valid strategy — and it lets you learn the system while your energy needs are lower.
The Real Cost Breakdown: What You’ll Actually Spend
Let’s talk numbers, because cost is usually the deciding factor.
A small off-grid kit for a cabin, shed, or tiny house — something in the 1-2 kW range with 5-10 kWh of lithium battery storage — will run between $3,000 and $6,000 for components, plus another $500-$1,500 for balance of system and installation materials. This size system can comfortably run LED lighting, a small refrigerator, phone and laptop charging, a few fans, and periodic small appliance use.
A medium system for a modest home — 3-5 kW of panels with 15-20 kWh of lithium storage and a 5,000-6,000 watt inverter/charger — will cost between $8,000 and $15,000 in components and materials. This can handle a full-size refrigerator, washing machine (but probably not an electric dryer), well pump, entertainment systems, and normal household lighting.
A larger whole-home system — 6-10+ kW of panels, 30-50 kWh of battery storage, possibly a 240V split-phase inverter for running heavy loads — can range from $15,000 to $30,000 or more. At this scale, you’re powering essentially everything a modern home needs, possibly including air conditioning (though AC is one of the most energy-intensive loads and requires careful planning).
For context, having a professional solar installer build an equivalent off-grid system would typically cost 40-60% more due to labor costs. The DIY savings are real and substantial — but they come with the investment of your own time, learning, and labor.
Regarding the federal Investment Tax Credit (ITC): as of 2024, a 30% tax credit applies to solar energy systems, including off-grid installations with battery storage. This credit applies to the full cost of the system, including batteries, which wasn’t always the case. A $10,000 system effectively costs $7,000 after the credit. Note that this is a tax credit, not a refund — you need to have sufficient tax liability to claim it.
Living With Your System: The Long Game
There’s a mental shift that happens when you go off grid that nobody talks about enough. You become deeply, almost instinctively aware of energy. You notice when clouds roll in. You schedule heavy loads — laundry, vacuuming, water pumping — for sunny afternoons when your panels are producing surplus energy. You develop an almost personal relationship with your battery state of charge.
Some people find this liberating. Others find it exhausting. Be honest with yourself about which camp you’re likely to fall into before committing. Off-grid living requires a degree of energy consciousness that grid-tied living simply doesn’t.
Maintenance is relatively minimal but not zero. Panels need to be kept clean — dust, pollen, bird droppings, and snow all reduce output. A hose and a soft brush handle most of it. Wiring connections should be checked annually for corrosion or loosening. Battery management systems (BMS) in lithium batteries handle most cell-level maintenance automatically, but monitoring your system’s performance over time helps you catch issues before they become failures.
Most modern systems include some form of monitoring — whether it’s a simple LED display on the charge controller or a dedicated battery monitor like an Eco-Worthy accessible from your phone. Monitoring isn’t a luxury; it’s how you know your system is healthy. A panel that drops from 350W to 200W output might have a failing bypass diode. A battery bank that charges slower than usual might have a bad cell. You want to catch these things early.
Who Should (and Shouldn’t) Go This Route
DIY off-grid solar makes tremendous sense for certain people and situations. If you have a property without existing utility service and the power company wants $15,000-$50,000 to run a line to your location — which is common for rural parcels — then an off-grid solar system may actually be the cheaper option while also giving you energy independence.
Off-Grid DIY Solar Kits make sense for cabins, hunting camps, workshops, and secondary structures where pulling a subpanel from the main house isn’t practical. It makes sense for RVs, boats, and mobile living situations. And it increasingly makes sense for homeowners who simply don’t trust the grid’s reliability anymore and want a completely self-contained power system.
Where it gets dicey: if you live in an area with cheap, reliable grid power and no particular interest in energy independence, the pure economics of off-grid solar often don’t pencil out compared to a grid-tied system with net metering. Off-grid systems cost more per kWh of electricity over their lifetime because of the battery component. Batteries are the most expensive part of the system; they have a finite lifespan, and they will eventually need replacement.
And candidly, if you’re not willing to learn the fundamentals of electrical systems, or if the idea of troubleshooting a tripped breaker at midnight makes you anxious, the full DIY approach might not be your best path. There’s no shame in hiring a professional installer — or in going with a hybrid approach where you design and purchase the system yourself but hire an electrician for the installation.
Conclusion of Off-Grid DIY Solar Kits
The off-grid DIY solar market is in a genuinely interesting place right now. Battery prices have fallen roughly 80% over the past decade. Panel efficiency keeps climbing. All-in-one inverter/charger units have made system design dramatically simpler than it was even five years ago.
Top Off-Grid DIY Solar Kits Supplier
| Name | Price Range | Discount |
|---|---|---|
| Sun Gold Power | $5,774 – $31,853.00 |  Get Special Offers Get Special Offers |
| Rich Solar | $7,999 – $25,99.99 | Get Special Offers |
| ShopSolarKits | $2,539 – $149,989.99 | Get Special Offers |
The knowledge base available through forums and YouTube channels run by experienced off-gridders means you’re never truly building in isolation — there’s a community of people who’ve done what you’re attempting to do and are willing to share what they’ve learned.
At the same time, this is still a significant project. It’s not ordering a product and plugging it in. It’s engineering a power plant — a small one, but a power plant nonetheless. The components need to be matched correctly, installed safely, and maintained over time. The investment is real, both financially and in terms of the knowledge you’ll need to acquire.
But here’s what I keep coming back to: there are very few things you can buy that pay for themselves. An off-grid solar system is one of them. Every kilowatt-hour it produces is a kilowatt-hour you didn’t buy from someone else. Over fifteen or twenty years, that adds up to real money — and real independence.
And there’s something deeply satisfying about flipping a light switch and knowing that the energy flowing through that wire came from panels you mounted, through wires you pulled, into batteries you connected, through an inverter you configured. You did that. The sun did the rest.
That’s not a bad deal.
| Power Station For Camping Near You | |
|---|---|
 |  |
| Get Amazon Special Offers | Get Walmart Special Offers |
You Might Also Like:
World’s Most Authoritative Sources:
- National Renewable Energy Laboratory (NREL). “PVWatts Calculator.” U.S. Department of Energy, pvwatts.nrel.gov. Accessed 2024.
- National Fire Protection Association. NFPA 70: National Electrical Code (NEC), 2023 Edition. National Fire Protection Association, 2022.
- U.S. Department of Energy. “Homeowner’s Guide to Going Solar.” Energy.gov, www.energy.gov/eere/solar/homeowners-guide-going-solar. Accessed 2024.
- U.S. Department of Energy. “Federal Solar Tax Credits for Businesses and Homeowners.” Energy.gov, www.energy.gov/eere/solar/federal-solar-tax-credits-businesses. Accessed 2024.
- Dunlop, James P. Photovoltaic Systems. 4th ed., American Technical Publishers, 2020.
- Hankins, Mark. Stand-Alone Solar Electric Systems: The Earthscan Expert Handbook for Planning, Design, and Installation. Routledge, 2010.
- Sandia National Laboratories. “PV System Performance and Reliability.” Sandia.gov, energy.sandia.gov/programs/renewable-energy/photovoltaics. Accessed 2024.
- International Renewable Energy Agency (IRENA). Electricity Storage and Renewables: Costs and Markets to 2030. IRENA, 2017.